After making my guide to MAC Transition Colors (click here) I decided to make another for their highlight shades. MAC has an astronomical amount of highlighters and I am only reviewing the ones I personally own — which is all but four depending on your skin tone. When purchasing highlighters you in no way need this many! I would recommend having at least one matte and one shimmery highlighter to begin with. It’s nice to have one neutral, one yellow based, and one pink based highlight — but not entirely necessary!
Personally I prefer a matte highlight, so in regards to the shimmery shadows I will try to remain unbiased!
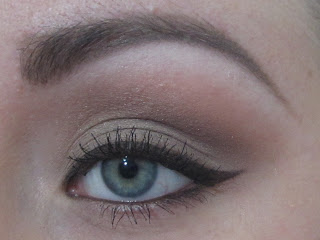
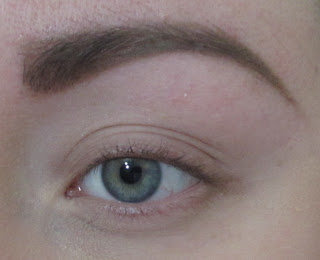
I hope that you find this helpful in your search for the perfect highlight! The pictures may seem a bit dark, but it is the best way to capture their true color without washing them out. Please click to enlarge!
Guide to MAC Matte Brown Eyeshadows (click HERE).
Guide to MAC’s Eyeshadow Finishes (click HERE)
 |
Top Left to Right: Gesso, Blanc Type, Vanilla, Mylar, Brule
Bottom Left to Right: Shroom, Dazzlelight, Naked Lunch, Nylon |
GESSO (Matte)
Gesso is a matte stark white and definitely has its place my kit. I like to use this when I want a very strong highlight, or if I’m wearing purples or greens. I think they changed the formula because it is a bit dry and you really have to dig your brush into it to get a good amount of pay off. If you would like one similar to this with shimmer I would go with Crystal Avalanche or Vapour.
BLANC TYPE (Matte2)
Blanc Type is a creamy beige with incredible payoff! I used to find this eyeshadow a bit too powdery, but I have been reaching for it a lot more lately because it does a great job of covering up any discoloration under the brow.
VANILLA (Velvet)
Vanilla is an ivory with slight pink undertones. I absolutely LOVE Vanilla for fair, light and even medium skintones. It is by far my favorite of all. Holy grail status! There is a tiny bit of sparkle in the pan, but it doesn’t really translate to the eye. Orb is similar but more pinky/peachy.
MYLAR (Satin)
MAC describes it as a creamy white with shimmer but it is more like a subtle sheen. I really like Mylar and I think it is great to wear when you want to do a natural “no makeup, makeup”.
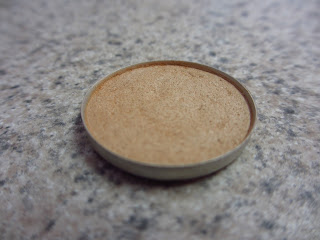
BRULE (Satin)
Brule is a soft creamy beige, which is a close match to most light skintones. I love to use it as an all over wash or a very subtle highlight. Although MAC calls it a Satin, Brule appears nearly matte on the eye.
SHROOM (Satin)
Shroom is a beige with shimmer and although MAC considers it a Satin, I think it is much more like a frost. This color is extremely popular but I do not love wearing it myself. It is a very neutral highlight, meaning it does not lean pink or yellow. If you like shimmer in your highlights Shroom may be a great option for you!
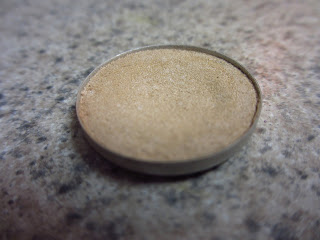
DAZZLELIGHT (Veluxe Pearl)
MAC says Dazzlelight is a neutral with shimmer but I think it leans slightly yellow. With that said, it is my favorite shimmery highlight in their permanent line. I love to wear it in the inner corner! This and Vanilla are my top two recommendations!
NYLON (Frost)
Nylon is a pale gold with shimmer according to MAC. I would call it a whole lotta shimmer with some pale gold mixed in… My Lord, it’s the frostiest eyeshadow I have EVER seen. I only use this on occasion when I want a very bright inner corner highlight. This is Dazzlelight’s crazy aunt twice removed!
RICEPAPER (Frost)
MAC calls Ricepaper a peachy gold with shimmer, and I agree with that description. This is too dark for me use as a highlight on my skintone, but is gorgeous for gals NC40 and above. I typically use it as a lid shade. Definitely has great texture and is smooth as buddah!
NAKED LUNCH (Frost)
Described as a minimal pink with shimmer, Naked Lunch has quickly become on of my new favorites! I typically wear it as a lid shade, but it makes a great highlight, especially if you are doing a look with other pinks!
So that’s it for my highlights… I hope that was helpful! Which is your favorite highlight? Please leave a comment below!
DON’T FORGET TO SUBSCRIBE!
Vanilla vs Blanc Type, Vanilla vs Gesso, Vanilla vs Mylar, Gesso vs Blanc Type, Shroom vs Mylar, Blanc Type vs Brule, Vanilla vs Brule, Dazzlelight vs Nylon, Dazzlelight vs Ricepaper, Nylon vs Ricepaper


.JPG)